FAQ
Version 4.1.1 of the ClayTracker Pro app contains the latest firmware update (20260108233548) for the ShotTracker.
Using the Auto-Boresite feature can help you complete your Profile entry quickly. In this video Jim an Paul walk you through the Auto-Boresite process. Auto-Boresite Video
Point-of-Aim (POA) is where the shotgun is pointed when taking a shot. Point-of-Impact is where the shot pattern was place on the target. POI’s can range for 50/50 to 120/0. In this video Paul and Jim walk you through determining your shotgun’s POI using the ShotTracker and the ClayTracker Pro app. Finding your POI Video
Free Account
This free subscription allows you see your ShotTracker’s last 200 shots. You can view your Shot Results, Video and Shot Details in a wide screen integrated format.
Standard Account
This account is an annual subscription, that gives you access to ALL of your ShotTracker Shots (unlimited number). You can view your Shot Results, Video and Shot Details in a wide screen integrated format. You can review all of your shots with the Analysis Dashboard and get access to Professional Coaching.
Team Account
This account is an annual subscription that allows a coach to set up a Team Roster and invite all the team members to connect their Cloud accounts. The coach has access to all of the team members shooting sessions (based the the individual members subscription) to perform both individual and team performance analysis. This is the perfect tool for school age and collegiate shooting teams
In summary, the Free and Standard Accounts are where the shots are stored and can be viewed. The Standard Account has more shots and has the Dashboard Analysis features. The Team Account allows a coach to consolidate and view all of the team members who have an account. The level of paid subscription of the user accounts set the level of features viewable by the coach.
To boresight the ShotTracker to your shotgun, turn on the ShotTracker, launch the ClayTracker application and select Profile from the Home page. Next select from the list the Profile corresponding to your shotgun. Determine what object you want to use for your boresighting target (i.e. the top corner of the high house, the back corner of the trap house….). With the ShotTracker firmly mounted to your shotgun (turned on with a green LED), press the Set Boresight button on the Profile page. Stabilize the shotgun while aiming at the boresight target and press the Begin Boresight button. Keep the shotgun stabilized on the boresight target for 5 seconds until the ClayTracker application “beeps”.
Next zoom in on the boresight image and touch your boresight aiming point to place a red reticle on the aim point. When the reticle is properly place press the Continue button.
Now enter the distance from where you were standing while boresighting the shotgun to the boresight aim point in yards. Then enter the distance from the ShotTracker lens to the end of the shotgun’s muzzle in inches. Finally enter the distance from the muzzle of the shotgun to the far end of the butt stock in inches. Press the Done button to complete the boresighting.
See Videos by Paul and Gil on boresighting in our Experts section.
The ShotTracker has not been configured. You need to: a) complete a Shooter Profile, b) get a boresight preformed for that Profile, and c) start a New Session using that Profile.
The “Shot Detection Threshold” may be set too low. Inside the ClayTracker application, from the Home page go to the “ShotTracker” page. If the detection threshold is low (between 0 and 20), raise the detection threshold by 10. NOTE: you must be connected to the ShotTracker for this change to take effect. If this does not correct the problem, raise the threshold some more until the false 2nd shot detections stop.
Yes, it is very important. When starting a New Session you are prompted to select “What you are shooting today?”. The options are sporting clays, skeet, trap and other. Each clay sport disciple has it rules for processing shot results. For example, in skeet no clay target is analyzed beyond 42 yards as that is out of bounds for skeet. If you selected skeet and were actually shooting sporting clays, none of your long shots over 42 yards would be analyzed. So be sure and select the proper clay sport for what you are shooting.
The maximum torque that can be applied to the hex mounting screw is 15 in-lbs.
The “Shot Detection Threshold” may be set too high. Inside the ClayTracker application, from the Home page go to the “ShotTracker” page. If the detection threshold is high (higher than 60), lower the detection threshold by 10. NOTE: you must be connected to the ShotTracker for this change to take effect. If this does not correct the problem, lower the threshold some more until the shot is detected.
Check your boresight.
Start a New Session using the “Other” option in the What are you shooting today? field. Next, shoot several position seven, low house targets on a skeet range. If you are aiming at the clay, then the clay icon and the red boresight reticle on the Results page should be in the center of the green circle. If the clay icon and the red reticle are centered in the green circle, then you need to check your shotgun and ammo at a pattern board to see that your POI is correct and that your ammo/choke combination is producing a uniform pattern. Inexpensive ammo can sometimes have “holes’ or “gaps” in the pellet pattern distribution.
Download the ClayTracker Pro application from your Apple or Android store. Place fresh batteries in the ShotTracker unit and note the SSID and PASSWORD marked on the battery door, then turn the unit on. Go to Settings on your smart phone and select Wi-Fi connectivity. Look for and SSID that you noted from the battery door label. Select that SSID and enter the PASSWORD. Exit Setting and launch the ClayTracker application. Select the ShotTracker button on the Home page. The ShotTracker page should show you are connected. Also, when the ClayTracker application is connected to the ShotTracker, the blue LED on the ShotTracker will flash every few seconds to indicate the two are connected.
On the Profiles page the active Profile’s button will have an orange border around it. From the Results page you can select the Profile button in the lower left hand corner to be taken to the active Profile.
During a session to make Profile changes to the Profile you are using (i.e. change a choke, change ammo, select a different clay target type….), go to the Profile button at the bottom on the Results page (NOTE: Make sure you are connected to the ShotTracker). That will take you to the Profile currently in use and allow you to enter Edit Profile mode. Once your edits are complete, select the Back button. Confirm your changes are correct. Then press Back again to return to the Results page. Your changes will take effect on the very next shot.
If you are making adjustments to a Profile and those changes are not being reflected in your Shot Results, you might not be editing the active Profile being used in the Current Session.
To make Profile changes to the Profile you are using during a session, edit the Profile from the Results page. (See FAQ – How do I make Profile changes during a shooting session?)
On the Results pages for any Shot Result, you can press the Shot Detail icon (the orange clay target on the bottom right side of the page0. This will pop up a page that shows all of that shot’s details including: Choke, Pellet Size, oz., Load, Pellet Type, Muzzle Velocity and Clay Target Type. Press the Close button to exit this screen.
Check and make sure that your phone is not set for a VPN connection on WiFi.
The SmartShot software inside the ShotTracker incorporates several different image processing techniques to find the clay target in your shot. On bright days with clear blue sky the software will process your shot in a few seconds. For cluttered backgrounds (Tree and bushes) or rabbit clay rolling through an orange debris field, more advance image processing is evoked and the processing of the shot can take up to ten seconds. If after thirty seconds the shot cannot be processed, the software responds with “Shot Detected – No Clay Found”. So, every once in a while, you might have a shot that cannot be analyzed.
Currently the ShotTracker does not handle night time clay shooting. We are working on that and anticipate having a solution in an upcoming software update.
The L16340 battery charger will recharge up to four rechargeable Lithium CR123 batteries. The charger plugs into a standard USB charging port.
Each charging slot has four LED indicators. When all four LEDs are on constantly (no flashing) that battery is full charged. If all four LEDs flash continuously when a battery is placed in the charger, the charger could not start the charging process (the battery was very depleted). Remove the battery and place it in a different slot for charging. If the battery does not begin to charge, it has reached its end of life, please discard / recycle appropriately.
As the battery is charging, once it has reached 25% charge the bottom LED will stay on and the LED next to the bottom will begin to flash. This sequence will continue as the battery reaches 50% and 75% charge levels. One the battery is completely charged all four LEDS will be constant on.
This is normal. When you are connected to the ShotTracker, you will not have access to the Internet over Wi-Fi. You will have Internet access on your smart phone via cellular data if that service is available based on cellular coverage.
All of the Shot Results and Simple Panoramic images are store in the ShotTracker’s onboard memory. When a smart phone or tablet is connected to the ClayTracker Pro app, the app “syncs” with the ShotTracker and downloads all of the Shot Results History. This allows for multiple different smart phones/tablets to be used with the ShotTracker.
To view the Simple Panoramic imagery, the ShotTracker must be on and the ClayTracker Pro app connected as this imagery is not stored permanenetly on the smart phone.
When you use the DELETE feature in the History Page to delete a session, it is deleting the information from the ShotTracker unit as well as the smart phone.
The area inside the green circle represents the region where there is a greater than 90% probability of breaking the clay. This means that for 9 out of 10 shots in the green the clay will break. It is also true that 1 out of 10 times it will not break.
Clays in the purple ring have a 5% probability of breaking. Clays that are on the outer edge of the purple ring and beyond have a less than 5% chance of breaking.
If your ShotTracker and ClayTracker Pro app are not communicating.
- insure that in your smart phone settings your WiFi is connected to the ShotTracker (ST_xxxxxxxx)
- Start the ClayTracker application and select the ShotTracker button on the Home Screen.
- If the page says Connected, but the ShotTracker Information button is greyed out the database is not in sync between the ShotTracker and the app.
- Try terminating the ClayTracker application and rebooting the ShotTracker the restarting the app.
- If that does not clear the issue, on the ShotTracker page press the Factory Reset button. This will clear the database and turn the unit off.
- Turn the ShotTracker back on, connect the WiFi, and restart the ClayTracker app.
- Go to the ShotTracker page. You should be Connected and all of the buttons enabled (not greyed out)
Yes, the ShotTracker automatically handles pairs/doubles. Any shot taken within 10 seconds of the previous shot is processed as a second shot. The Results audio will be preceded by “Shot Two…”
- For Continental trap, select Trap for you shooting sport when starting a session and set the Clay Type in your Profile to Standard.
- For Olympic trap, select Trap for your shooting sport when starting a session and set the Clay Type in your Profile for International.
- For Bunker Trap, select Trap for your shooting sport when starting a session and set the Clay Type in your Profile for International.
- When you look at the Simple Panoramic imagery on a “No Clay Found” Shot Result and you are seeing the ground or your feet, your shot detection threshold is set too low. The breach closure is giving you a false trigger. Go to the main menu on the ClayTracker app and select the ShotTracker button. Move the slider on the Detection Threshold higher (try 10 point increments) until the false triggers stop.
- When you look at the Simple Panoramic imagery on a “No Clay Found” Shot Result and you see green screen images, you are taking your shot before the ShotTracker’s LED turns constant green. The camera is not completely powered up exiting Ideal Mode. To correct this issue, when getting ready for your shot, wait until the LED turns constant green.
If you turn on your ShotTracker and the Red flashing LED does not turn off after 15 seconds, the onboard computer did not initialize properly. Press and hold the On/Off button for 10 seconds (make sure to press the center on the button) until the flashing Red LED goes from slow flash to fast flash then release the button.
The ShotTracker should now be off. If it does not turn off repeat the process above again.
Once the ShotTracker is off, you may turn it back on by pressing the On/Off button.
First of all the ShotTracker holds all of the shot results data. A copy of that data is synced (uploaded) to the ClayTracker app when the app connects to the ShotTracker and a syncing process occurs. The only way shot results data is ever deleted is if you Delete a Shooting Session using the History menu or a Factory Reset is performed on the ShotTracker.
If your phone has been connected to a different ShotTracker (Unit #2), the next time you connect to your ShotTracker (Unit #1) you will get the prompt “Different ShotTracker Connected – Would You like to sync?” By answering “Yes”, the shot results data from your ShotTracker (Unit #1) will be synced “uploaded” into your ClayTracker app.
Next your will be prompted “Are you sure? – This will overwrite all current app data!” By answering yes, all of the data from your ShotTracker (Unit #1) will be uploaded to your ClayTracker app replacing (overwriting) the shot results data from the previous ShotTracker (Unit #2).
Sub-gauge barrel pads to support 20 ga., 28 ga., and 410 bore shotgun barrels are now in stock. Call or email us to get a set free of charge.
Installing and Fitting the Sub-12 ga. Barrel Pads
The sub-12 ga. pads swap out with the regular 12 ga. barrel pads to allow the ShotTracker to fit 20 ga., 28 ga., and 410 bore barrels. We recommend the following configurations. But in the end customers can use what they feel best fits their actual barrel diameter.
- For regular 12 ga. barrels use the two 12 ga. barrel pads
- For 20 ga. to 16 ga. size barrels use one 12 ga. barrel pad on the fixed side of the mount and
a sub-12 ga. barrel pad on the moving side of the barrel mount. - For 28 ga. to 410 bore barrels use two sub-12 ga. barrel pads.
Yes, ShotTracker does helice. When starting a new shooting session, select “Helice” from the list of games. It is between Trap and Special in the list.
Recent Android operating system updates have added a feature where by if the WiFi connection does not connect to the Internet the WiFi connection is dropped.
To overcome this follow the following steps:
1) On your phone go to the WiFi setting page and FORGET the ShotTracker SSID if one is listed.
2) Now, turn on your ShotTracker and once it is up and running, go to the WiFi settings on your phone.
3) Reconnect to the ShotTracker (you will need the password from the battery door).
4) The phone will ask some questions (Hopefully). When prompted tell it to keep this ShotTracker connection up even if there is no Internet connection.
5) It should now connect and stay connected.
6) Now start the ClayTracker Pro app and answer “yes” to the prompts as the program starts and syncs with the ShotTracker.
7) You should now get a blue flash on the LED every five seconds to indicate that the ShotTracker is connected to the phone
The grid display on the Results graph is a toggle function. Press anywhere on the graph that is not a button or text field and the grid will toggle between being On or Off for each touch.
Solution:
- Delete the ClayTracker Pro app from your phone.
- Forget the Network in the Settings – WiFi connections.
- Reboot the iPhone.
- Reconnect the WiFi to the ShotTracker and re-enter the Passcode found in the inside of the battery door.
- Re-download the ClayTracker Pro app and open it.
- Make sure to enable the ClayTracker Pro app to connect to devices.
If the Auto Boresight process fails, then either there is a lighting issue where the target is not uniformially lit or your are not straight on to it. If this happens then simply do the manual boresight process where you hold it the same way, but you touch the display on the phone where you were pointing the gun and a reticle will appear. Then enter the three numbers that it requests.
The Boresight and all of the Profile Data is stored in non-volatile memory on the ShotTracker, so when you shut it off, all the information is stored. As a best practice, we recommend re-boresighting when you have removed the ShotTracker from the gun and reinstalled it.
When you are in an active shooting session, the LED will stay Green as long as the gun is in a “ready” position. If the barrel of the shotgun does not go more than 45 degrees up or down, it will stay Green.
If you put the shotgun in a rack, then the ShotTracker will detect that it is greater than 45 degrees. After six seconds at greater than 45 degrees, the ShotTracker go into to Idle Mode. That is when the LED will turn Magenta in color.
When you put the shotgun back in a “ready” position, after one second the LED will once again turn Green. The ShotTracker is ready and waiting for a shot.
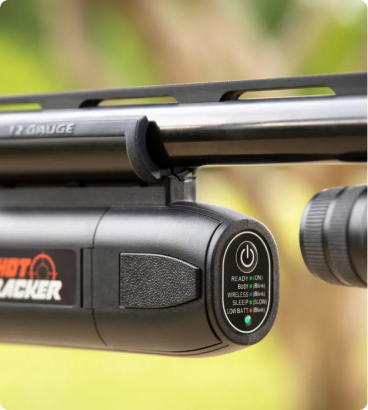
Once you have started a shooting session, the LED will go Green when the shotgun is in a “ready” position. If the ClayTracker Pro app is connected to the ShotTracker, a Blue flash every five seconds. A constant Green means that the ShotTracker is ready and looking for a shot to happen. The Blue flash indicates that the WIFI is connected and that the app on the phone is communicating with the ShotTracker. If a Red flash occurs, the it is time to replace the batteries.
Yes, The SmartShot software is capable of tracking a clay in a dense tree background. Watch this video to see how the ShotTracker performs – ShotTracker in a wooded environment.
The ShotTracker is communicating where the Center of the Pattern was with respect to the clay target.
You can be “low and behind” and still have the clay inside the Green circle which is the Crush Zone with a high probability of breaking the clay. So, the “low and behind” feedback is to help you better center the pattern perfectly onto the clay.
If your feedback is “Try Again, the center of the pattern was low and behind”, then the clay was outside the Green circle with a low to zero probability of breaking the clay.